How Do You Install a Two Handle Shower Valve?

How Do You Waterproof Thick Cardboard?
January 12, 2024
How Do You Respond to a Low Salary Offer?
January 16, 2024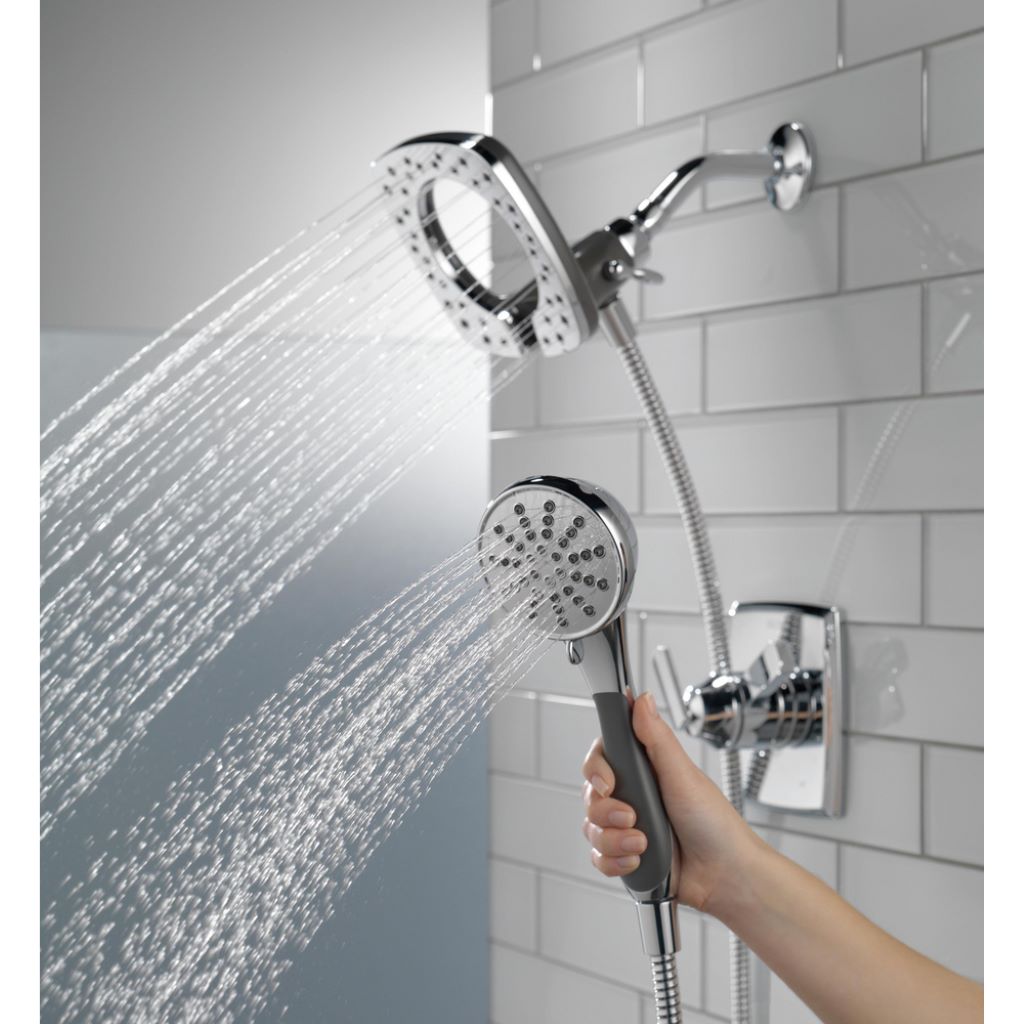
Installing a new two handle shower valve can seem like a daunting task, but with the right tools and a bit of plumbing know-how, it’s a project any DIYer can tackle. A two handle shower valve gives you separate control over the hot and cold water flow, allowing you to find your perfect temperature. Replacing an old shower valve with a new two handle model can also improve your shower’s performance and refresh its look.
In this guide, I’ll walk you through the entire process of installing a two handle shower valve step-by-step. By the end of this guide, you’ll have the knowledge and confidence to install a two handle shower valve like a pro. Let’s get started!
Choosing the Right Two Handle Shower Valve
The first step is selecting the right two handle shower valve for your bathroom and plumbing setup. Here are the key factors to consider:
Valve Type
The most common types of two handle shower valves are:
- Cartridge valve – This has a cylindrical cartridge that controls water flow and temperature. Cartridges are durable and easy to maintain.
- Ceramic disc valve – Ceramic discs inside the valve control the flow. Ceramic valves withstand high temperatures and pressure.
- Compression valve – Rubber washers inside the valve body control water flow. Compression valves are affordable but don’t last as long.
Cartridge and ceramic disc valves are preferable for their durability and performance. Compression valves are a budget option. Explore how to replace a two handle bathtub faucet using these advanced valves for improved efficiency and reduced chances of wear and tear.
Valve Finish
Most two handle valves come in chrome, brushed nickel, oil rubbed bronze, or matte black finish. Choose a finish that matches your bathroom’s other fixtures and hardware.
Valve Dimensions
Measure the existing valve rough-in and hole spacing to ensure the new valve will fit properly. Standard spacing is 4 inches on center, but older valves could be different.
Added Features
Look for a valve with extras like:
- Adjustable hot limit stop for safety
- Back-to-back installation capability
- Integrated or compatible diverter for handheld showerheads
- Reversible cartridge for simplified installation
Brand Reputation
Stick with reputable plumbing brands like Moen, Kohler, or Delta that offer warranties on their valve products.
Once you select the right two handle shower valve for your needs, it’s time to get set up for installation.
Preparing for Installation
Replacing a shower valve requires working inside a wall, so there are a few important steps to take before you get started.
Turn Off Water Supply
Locate the shut-off valves for the shower’s hot and cold water lines. They are usually under the sink or near the water meter. Turn them clockwise to shut off the water.
Protect the Shower Floor
Lay down towels or cardboard to catch any water drips or debris while you work.
Clear Access to the Shower Valve
Remove any bath or shower surround panels as needed to fully expose the existing shower valve. Having ample working room is key.
Gather Supplies
You’ll need:
- Adjustable wrench
- Channel lock pliers
- Screwdriver
- Teflon tape
- Emery cloth or sandpaper
- Plumber’s putty
- Shop vacuum
Plus any special tools required for your new valve. Review the manufacturer’s instructions.
Turn Off Power
Turn off the home’s main water heater breaker so you can safely work on the valve.
Pick an Installation Time
Schedule several hours when you can devote your full attention to the project without interruption.
With all your prep work complete, it’s go time!
Removing the Old Shower Valve
Taking out the old shower valve takes patience and care to avoid damaging the surrounding shower walls and plumbing. Follow these steps:
Remove Decorative Trim
The handle assemblies, escutcheon plates, and any other decorative trim must be taken off first. Look for small set screws on the undersides. An adjustable wrench can help loosen stuck trim pieces. Set all hardware aside to reuse or replace later.
Expose Piping
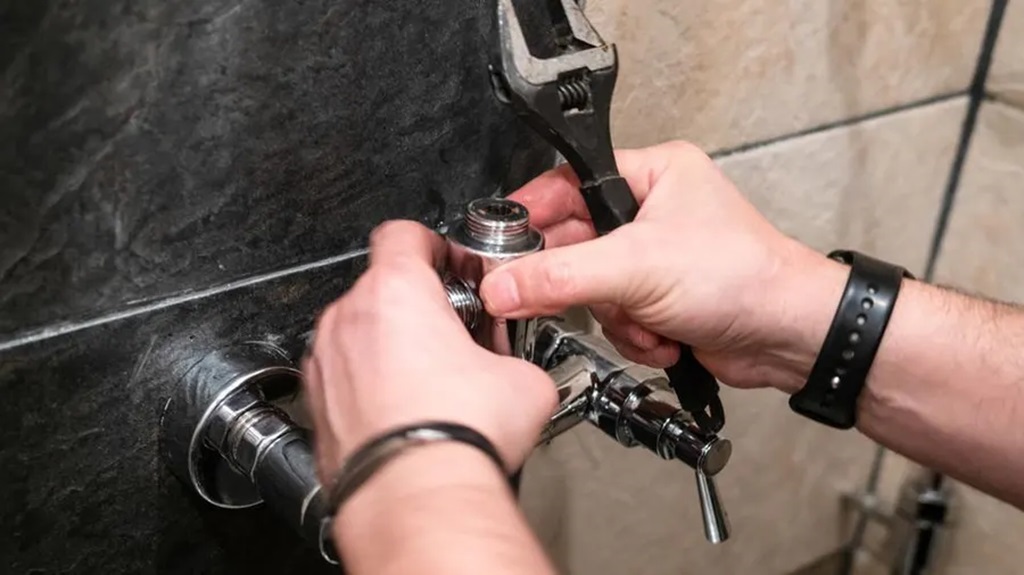
With the trim gone, you’ll see the valve’s hot and cold supply pipes extending from the wall. Use a mini hacksaw to cut the pipes as close to the wall as possible.
Detach Remaining Valve Portions
Unthread any large retaining nuts still holding the valve to the shower wall with channel locks or an adjustable wrench. The entire valve can now be freed.
Clean Things Up
Use a shop vacuum to remove any old plumber’s putty, gasket material, or debris inside the valve cavity. File down any burrs or rough edges on the cut supply pipes.
Assess for Problems
Inspect the exposed pipes and surrounding area. Look for leaks, corrosion, cracks, or other damage that needs addressing before the new valve can go in.
With the old valve cleared out, the site is prepped and ready for the exciting new upgrade!
Installing the New Two Handle Shower Valve
Installation time! Follow these key steps to properly put in your new two handle shower valve:
Apply Plumber’s Putty
Roll plumber’s putty into two long snakes and place around the rim of the valve body. This seals and waterproofs once compressed against the wall.
Insert Valve Into Opening
Orient the valve correctly, matching hot and cold inlets to the corresponding pipes. Firmly seat the valve body into the wall opening, smushing the putty into place.
Secure Valve
Attach the valve retention plate and any washers or gaskets included with your model. Tighten the retaining screws or nuts to hold the valve body snugly against the wall. Don’t overtighten.
Attach Handle Assemblies
Thread on the new handle assemblies, escutcheon plates, and trim pieces. Refer to the manufacturer instructions. Lightly tighten set screws.
The valve itself is now installed! Next you must complete the hot and cold water connections.
Making the Final Water Connections
Connecting the water lines to the new valve requires care to avoid leaks. Here’s how:
Clean and Prep Pipe Ends
Use emery cloth or sandpaper to scrub 1-2 inches of the cut pipe ends. Remove any old putty or gunk.
Apply Teflon Tape
Wrap the threads on each pipe with 2-3 overlapping layers of Teflon tape. This seals the threads to prevent leaks.
Connect Hot and Cold Lines
Thread the hot line into the hot inlet and cold line into the cold inlet. Hand tighten initially. Finish tightening with an adjustable wrench.
Turn on Water
Turn the hot and cold main shut-off valves back on SLOWLY. Let the shower lines fill up and check for any drips or leaks before continuing.
Flush Debris
Temporarily remove the valve handle cartridges or discs. Turn on the water to flush out any dirt, Teflon tape, or other debris.
Install Cartridges/Discs
Replace the cartridges or discs in the valve. Be very careful not to damage or dislodge any internal gaskets or o-rings.
With everything tightened up and leak-free, your new shower valve is ready for action!
Testing and Finishing Touches
The valve is installed, but we need to wrap up with some final testing and adjustments:
Check for Leaks
Turn the water on full pressure and inspect all connections for drips or leaks. Tighten joints as needed.
Adjust Temperature
Turn the hot and cold handles to find your ideal shower temperature. Adjust the valve’s limit stop accordingly.
Reinstall Trim
Snap decorative handle trim and escutcheon plates back into place if removed earlier.
Seal with Caulk
Apply a bead of tub and tile caulk around the edge of the valve plate to waterproof and finish.
Turn Power Back On
Reactivate the water heater breaker you switched off earlier.
Test Shower Function
Take your new two handle valve for a test drive! Enjoy improved shower control and performance.
Clean Up the Mess
Mop up any remaining plumber’s putty or caulk. Remove any floor protection and replace the shower surround panels.
With your handiwork complete, relax and treat yourself to a long hot shower!
FAQs
How do I remove an old shower valve that’s stuck?
Penetrating oil around the valve body can help loosen a seized valve. Allow it to soak in for an hour or more. Tap the wrench with a hammer to help jar it free. Heat from a hairdryer can also expand and loosen a stuck valve.
What if my valve rough-in dimensions don’t match my new valve?
Installing a spacer kit behind the valve modifies it to fit different rough-in dimensions. Choose a compatible spacer made for your valve brand.
Do I need special tools to remove the old cartridge or discs?
Most cartridges and discs can be extracted with standard pliers or channel locks. Some valves have plastic retainers that must be rotated out by hand. Check your manufacturer instructions.
How do I adjust the new valve’s temperature limit stop?
Limit stops have hex screws that, when turned clockwise, decrease the maximum hot water mix. Counterclockwise opens it further. Turn slowly and test the water temp frequently.
Why does my new valve leak even when turned off completely?
This indicates a problem with the cartridge or internal seals. Disassemble the valve and inspect for debris or damage to o-rings and gaskets. Replace any worn seals.
What should I do if the leak persists from the valve body or pipe connections?
More Teflon tape, tightening joints, or fresh plumber’s putty may be needed to seal leaking pipe threads. For the valve body, try re-positioning it or removing it and applying more putty before re-installing.
Conclusion
Installing a new two handle shower valve boosts your shower’s performance and provides reliable temperature control for years to come. While it’s not necessarily a quick or easy DIY job, it’s very doable for a motivated homeowner armed with the right information. If you take your time, exercise patience, and follow the steps, you can upgrade your shower valve like a professional plumber. When tackling the task of cleaning a disgusting bathtub, start by scrubbing away grime and soap scum, but don’t forget the importance of maintaining your shower fixtures. Just be sure to turn off the water, remove the old valve carefully, install the new one correctly, and thoroughly test for leaks at the end. Before you know it, you’ll be enjoying the luxurious feel of your revamped shower, both clean and upgraded.
