How Do You Waterproof Thick Cardboard?

How to Dress Two Bedroom Windows?
January 10, 2024
How Do You Install a Two Handle Shower Valve?
January 14, 2024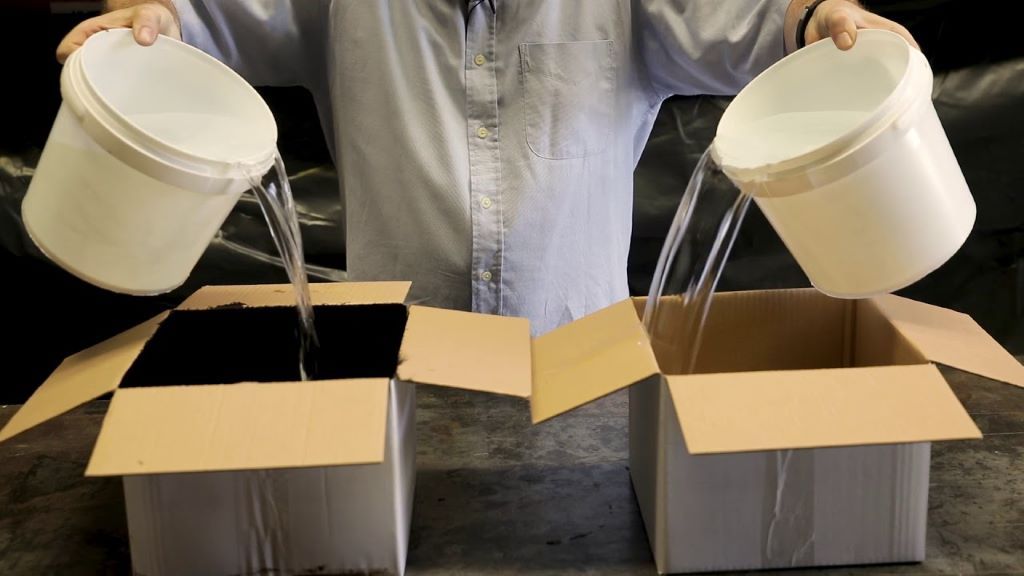
Working with cardboard can be a fun and creative endeavor. From creating costumes and props to building furniture and decorative pieces, cardboard is an accessible and versatile material for DIY projects. However, cardboard has one major drawback – it’s not waterproof. Exposure to moisture can make cardboard sag, warp, and disintegrate.
So how do you make cardboard water resistant? With the right supplies and techniques, you can create cardboard projects that can withstand spills, rain, and other wet conditions. In this guide, I’ll explain several methods for waterproofing thick cardboard, from quick fixes to more heavy-duty solutions.
Why Waterproof Cardboard?
Before jumping into the how-to, let’s look at why you might want or need to waterproof cardboard in the first place:
- Outdoor use – If you’re using cardboard for outdoor decor, lawn furniture, kids’ playhouses, etc., waterproofing is a must to prevent damage from rain and moisture.
- Costumes and props – Cosplayers and theater crews often use cardboard to create lightweight costumes and props. Waterproofing allows these items to be used outdoors without risk of ruin.
- Temporary structures – For temporary outdoor structures like cardboard playhouses, waterproofing helps them withstand the elements.
- Spills and accidents – Waterproofing provides protection if liquids accidentally get splashed or spilled onto your cardboard creation.
- Protection during storage – Waterproofing before storing cardboard items protects them from moisture damage during storage in basements, garages, etc.
Certainly! Waterproofing not only protects cardboard projects from moisture but also opens up new possibilities for their use. Discover how to make cardboard stronger with a few simple materials and techniques. By applying these methods, you can achieve great results and ensure your cardboard creations withstand various environmental conditions.
Supplies Needed
Waterproofing cardboard relies on sealing the surface to prevent moisture from being absorbed. This requires coating the cardboard completely with a water-repellent sealant.
Here are the key supplies you’ll need:
Sealant
The most important supply is the sealant you’ll apply to the cardboard. Good options include:
- Polyurethane – Polyurethane is the best choice for truly waterproofing cardboard. It forms a durable, flexible plastic coating. Use an oil-based polyurethane for best water resistance.
- Mod Podge – Mod Podge acts as both glue and sealant. It’s easy to apply and dries clear. The Outdoor variety provides more protection.
- Spray paint – Regular and clear matte spray paints add a degree of water resistance. Enamel paints offer the most protection.
- Beeswax mixture – Mixtures like beeswax, linseed oil and pine resin create a natural water-repellent finish.
- Epoxy resin – Two-part epoxy resin creates a glassy, waterproof finish. Best for smooth, small surfaces.
Application Tools
To apply sealants evenly, you’ll need:
- Brushes – Opt for good quality bristle brushes in a few sizes.
- Sprayers – Sprayers allow you to coat large cardboard pieces quickly.
- Sponges – Sponges help apply sealant evenly to corrugated cardboard.
- Paint rollers – Foam rollers help smoothly coat cardboard with polyurethane.
Additional Supplies
Other helpful items include:
- Sandpaper – Lightly sanding smooths cardboard to help sealants adhere.
- Drop cloth – Protects your work area from drips and spills.
- Dust mask – Prevents inhaling fumes from products like spray paints.
- Disposable gloves – Keeps hands clean and avoids staining from certain sealants.
With these supplies in hand, you’re ready to start waterproofing.
Prepping the Cardboard
Before applying any sealants, it’s important to properly prepare the cardboard surface:
- Wash and dry – Remove any dirt, dust and debris with mild soap and water. Allow to fully dry.
- Fill holes and gaps – Seal any holes, gaps or seams with acrylic caulk. Allow caulking to dry completely.
- Sand rough edges – Lightly sand cut edges and extremely rough areas to help the sealant adhere.
- Wipe with acetone – Wiping cardboard with acetone removes surface oils and helps sealants stick.
- Use primer – If using spray paints, apply a coat of plastic primer first for better coverage.
- Work in ventilated space – Ensure your work area has good airflow to prevent fumes from building up.
Proper prep takes a bit of time but helps the waterproofing last much longer.
Waterproofing Techniques
Now let’s go through the step-by-step process of applying different sealants to waterproof cardboard:
Using Polyurethane
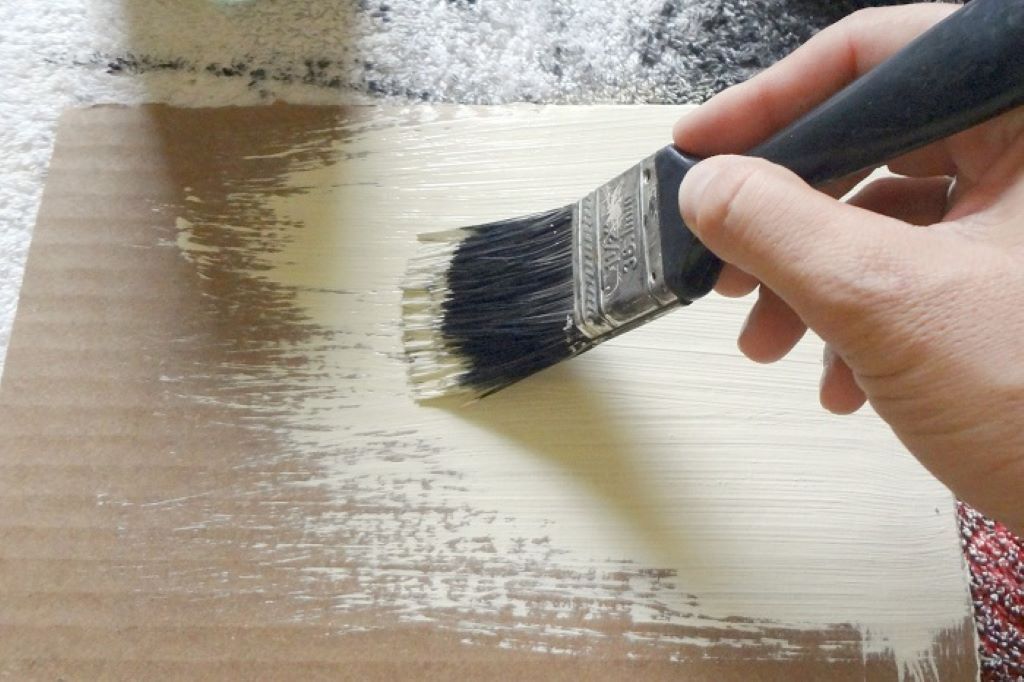
Polyurethane is the ideal choice for maximum water resistance. Here’s how to apply it:
- Begin with 2-3 thin coats, allowing drying time between coats. Thin coats prevent dripping and running.
- Using a foam brush or roller, apply polyurethane in smooth, even strokes. Coat all cardboard surfaces.
- Allow at least 24 hours of drying time between coats. Lightly sand any rough spots.
- Finish with 2 thicker topcoats of polyurethane for maximum protection.
- Allow several days for the polyurethane to fully cure before use. The longer it cures, the more water resistant it becomes.
Polyurethane works especially well for outdoor use, since it stands up to sun, rain, and snow. The finished product will have a smooth, plasticky feel.
Using Mod Podge
The popular decoupage medium Mod Podge also seals and protects. Follow these steps to apply:
- Brush on a coat of Mod Podge as evenly as possible, covering all cardboard surfaces.
- Allow 2-3 hours drying time, then lightly sand any rough texture.
- Apply a second thick, smooth coat. Work quickly to avoid sticky brush strokes.
- Let the 2nd coat dry for several hours, then do a third layer for maximum protection.
- After the final coat dries overnight, the cardboard will resist moisture.
The Outdoor Mod Podge formula provides even better water resistance.
Spray Painting
For a quick waterproof fix, spray painting cardboard is an option. It provides light to medium water resistance. Here are tips for best results:
- Use heavy duty enamel spray paints if possible – they offer more protection than standard paints.
- Apply paint in thin, even layers, allowing drying time between coats. Too much paint causes drips and weak spots.
- Cover all cardboard surfaces evenly. Cardboard edges absorb more paint and need extra coats.
- Allow the paint several days to fully cure and become water resistant.
- Reapply paint periodically as needed, since spray paint scratches and chips over time.
Clear matte spray paint is useful for preserving cardboard’s appearance while adding some water protection.
Beeswax Waterproofing
For a non-toxic and natural waterproofing option, try beeswax! This old-fashioned wax mixture penetrates cardboard to make it water resistant.
- Melt together equal parts beeswax and linseed oil. Allow to partially cool.
- Work the warm liquid into the cardboard using a stiff brush or cloth. Apply liberally.
- Add pine resin to the mix if you want extra waterproofing power. Resin makes the finish more flexible.
- Allow the cardboard to dry completely – this can take 1-2 days.
- Rub excess wax off the surface once dry. The waxed cardboard will now shed water.
Reapply the wax mixture annually to maintain effectiveness. The finish remains permeable so cardboard can breathe.
Using Epoxy Resin
For a glassy, waterproof finish, 2-part epoxy resin is great but only suited for small, smooth surfaces. Here’s how to apply it:
- Mix the epoxy resin and hardener according to package directions.
- Pour or brush resin evenly over the cardboard surface. Spread smoothly and avoid bubbles.
- Let resin fully cure for 24 hours. It creates a thick, glossy finish.
- Lightly sand any drips or rough patches. Apply another coat for maximum shine and protection.
- Consider adding color dyes to the resin for decorative effects.
Once cured, the epoxy resin bonds to the cardboard to form a plastic-like water barrier. Use resin for decorative trays, jewelry, and other accessories.
Avoiding Problems
To get great results from waterproofing, watch out for these potential problems:
- Not enough drying time between coats – Sealants need proper curing time to work effectively.
- Drips and brush marks – Apply sealants as smoothly as possible to avoid an uneven finish.
- Incomplete coverage – Check that sealant penetrates into every crevice and fully coats all cardboard surfaces.
- Sealant pooling in corrugations – Fill corrugated cardboard valleys with caulk before waterproofing to create an even surface.
- Trapping moisture underneath – Make sure cardboard is fully dry before you begin waterproofing.
With attention to detail, you can avoid these pitfalls. Test sealants on cardboard scraps before doing the final project.

Maintaining Effectiveness
Waterproofing cardboard isn’t a one-and-done process. To ensure your projects stay protected:
- Periodically check pieces for any cracks or missing sealant. Touch up these spots as needed.
- When sealant starts noticeably wearing off, sand lightly and reapply a fresh coat.
- If water stops beading on the surface, it’s time to redo the waterproofing.
- For outdoor items, reapply sealant every 1-2 years as seasonal weather takes its toll.
With proper maintenance, your cardboard creations can last for many years, rain or shine!
FAQs
What’s the best sealant for outdoor use?
For cardboard pieces that will live outside, polyurethane is your best bet. It stands up to sun, rain, snow and humidity better than other options.
Can I waterproof corrugated cardboard?
Yes, corrugated cardboard can be effectively waterproofed using any of the sealants mentioned. The key is fully saturating the corrugated layers, so products like thinned polyurethane work well.
How long does it take sealants to dry?
Drying times vary based on temperature, humidity and which product you use. Light coats of polyurethane only need 2-4 hours between coats. Thicker layers, epoxy resin and beeswax mixtures need 24 hours or more to fully dry.
Is waterproof cardboard food safe?
If you’ve used a non-toxic sealant like beeswax or food-safe epoxy resin, waterproof cardboard is fine for food serving. Avoid using painted or polyurethane coated cardboard for food.
Can I paint over waterproofed cardboard?
Yes, you can paint waterproofed cardboard pieces if desired However, this will likely damage some of the water resistance, so you’ll need to re-seal the painted cardboard for full protection.
Parting Thoughts
With the right preparation and application technique, various sealants can make cardboard water resistant for all kinds of fun crafts and building projects. Transform your space into a Valentine’s Day haven by creatively adorning your walls with heartwarming emojis. Just remember to properly prep the cardboard, apply sealant evenly and thoroughly to all surfaces, allow adequate drying time, and properly maintain the finish for a festive and lasting decor.
Your cardboard creations will be ready to withstand the splashes, spills and showers of daily life. So grab some cardboard and sealant, get creative, and make something awesome!

